Showing posts with label diy. Show all posts

Tuesday, January 27, 2009

DIY projects....last bit!

This should really be it for diy projects. I did quite a bit over the weekend and finally am getting around to posting pics. It's quite a bit so bear with me ;-)

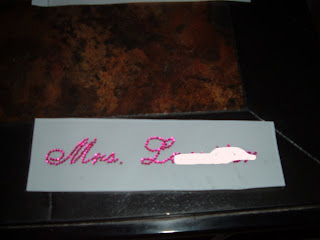
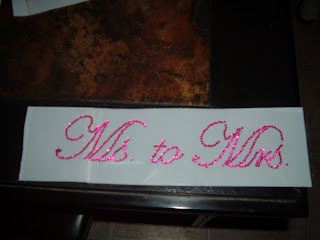
First, I decided to do an iron on for my Mom with the leftover rhinestones I had. Used them all up:I have instructions for how to do this if you click on diy or bridesmaids, it will come up.

Next, I did petal toss signs, menus, for the bar and dinner, and cards sign. The petal toss sign I made in Publisher. The poem I found on good ole trusty google!:


I made the bar sign in Publisher. Found the recipes on greygoose.com. We love the Goose!
The dinner menus were made in Publisher also. I'm printing them on VistaPrints oversized vertical postcards and tucking them into the napkins at each place setting.
This cards sign was also made in Publisher. Where the yellow piece of paper is on the treasure chest is where this sign will go:I got around to designing my card box. It's a treasure chest (we already owned) with fish netting, pink and ivory pearls, and starfish. I also bought a hermit crab for decoration:


The above photo is the bottom of the chest which will have a little sand to cover the bottom and a knobby starfish as well.


Here are my beautiful petal cones:
I bought gold colored doilies from Michaels, used double sided tape to roll them up and stick the bows on that I hand tied with ribbon purchased from Michaels also. I alternated ribbon colors with pink and brown. I'm going to display them in a brown basket with the instructions sign next to them. I love how they turned out:
Here's the brochures I made in Publisher for the OOT boxes. This is the inside:
Outside:
My table numbers also completed in Publisher, just a few for you to see:Lastly, our rehearsal dinner invites. I plan on giving these out in Florida either hand delivered or in the OOT boxes for the bridal party and their spouses/significant others. Here's the front:
And the back with directions to the restaurant from Paradise Cove:
Whew! That is it! I am done with diy! I think.....heehee.

Friday, January 23, 2009

DIY projects

It's getting down to the wire! I still have a few projects to complete. Today, I took off work so I'm going to tackle this list:
  • Rose petal cones
  • Brochures (OOT boxes)
  • Rose petal sign
  • Fish net for card box
  • Rehearsal dinner info card
That's it for now. Let me get busy because family is on their way up for the funeral tomorrow and I want to chill out at least part of the day. I'll be back with pics!

Friday, January 9, 2009

Custom rhinestone iron ons

So part of my gift to my bridesmaids and maids of honor is that I decided to do custom rhinestone iron ons. I like the "Bride" and "Bridesmaids" ones but they may not wear those again. So for each girl, I took their nick names or married names or what they call themselves and made an iron on.

The first one here is for Tiffiny aka Ms. Boss. First you make the words in Word, Publisher, or whatever application you choose. For this one I chose Edwardian Script. You have to stretch the wording, actually it's called kerning, so you have enough space between the letters to place the rhinestones. You change the text in Publisher by right clicking on the word after it's highlighted, choose character spacing and the new box will pop up for you to change the spacing. Once that's done and you're satisfied with how it looks, go to your printer settings. This will vary for each individual as far as how you do this, but you have to print your wording in mirror text.


This is how it looks printed:
Once you have it printed, you take your mylar paper and place it over the wording sticky side up. Tape it down so the words don't move on you. Then, using tweezers place the rhinestones on the sticky paper stone side down, tracing the wording. This is mine completed with the stones:


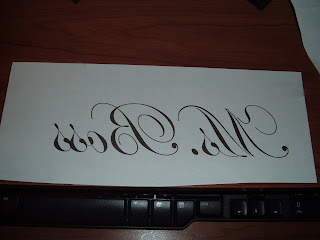
Once you have all the stones in place, place the backside of the mylar paper back over the sticky side and smooth it out. Voila! You are done. This is my finished iron on:


I made one for each girl and I plan to iron them onto tank tops I purchased from Old Navy. Each tank is a different color depending on their tastes. For example, my MOH Mai, loves purple, so she has a purple tank. I used different fonts with some of them, just playing around. In order, these are English 111 Vivace, Edwardian Script, and Passions Conflict.


Another one for my girl Wendy. She's a Diva, lol. The font is English 111 Vivace:


The top one here is for MOH Mai. I've been calling her Motts since we were 7 years old! The 2nd one is my new last name with our wedding date. I'm putting that one on a light pink tank top to wear on our honeymoon.


This one is for my boyshorts to wear the day of the wedding. The font is English 111 Vivace:

This is going on the back of my hoodie to wear the day of the wedding. The font is Edwardian Script:

That's it. Hopefully this is helpful if you're thinking of doing it yourself. I bought the rhinestones from eBay for about $5, the mylar paper for $5 and each tank for $5. Very cheap DIY project and I think the girls will love them. I actually had so much fun making them, I'm thinking about hiring myself out to make them for others. We'll see.

Tuesday, December 9, 2008

Menus and Invites

These are DIY as well. The 2nd set of invites and the rehearsal dinner menus. The invites were pretty easy; designed them in PowerPoint and had them printed by VistaPrint. I must say; the wording is a little difficult to read at the top. Other than that they are good to go. They came with rose colored envelopes and my RSVP card and Directions card will fit in their nicely. Like one of the knotties suggested, I am sending these to the older crowd (Mike's uncle, my grandmother, and I forgot the last one, lol) We actually have 20 of them with 10 envelopes, so we're actually debating adding a name or two if possible. Eh, we'll see. Kinda late in the game to expect someone to make travel arrangements but you never know.

The rehearsal dinner menus are for the rehearsal dinner at Bahama Breeze. I chose 3 entrees off the menu and decided that's what we're paying for. They don't cater to small parties, so we couldn't rent a room for privacy and we may be seated in the same area at different tables. Right now, that's not sitting too well with me, so I'm thinking about other options. We'll see. I love how the menus turned out but I haven't printed them yet (luckily for me) because we aren't 100% sure that's where it's going to be.

Friday, December 5, 2008

More on invites....

I just took a look at the bottles and the VistaPrint invites came in. Everything looks great. The only problem I see with the VistaPrint invites is that the wording isn't that clear; it's legible, but I think because of the coloring it makes it a little harder to read. Oh well. As a bonus for us, VP made a mistake and sent 20 instead of 10, although they did only send 10 envelopes. Either way, I won't be needing that many. I think we have a total of 70 that we need to send out, and we have 65 bottles and 20 invites from VP. I'm happy with them and just happy that it worked out in time.

I'll post pics of everything as soon as I can. My desktop computer is out of commission right now so I'm using my laptop for now.

Off to watch The First 48 and then to bed. Later ;-)

Thursday, December 4, 2008

Catch up!

Whew, it's been a busy few days! I haven't posted since Thanksgiving, I think. We had family up from North Carolina and we had one heck of a weekend. So much has happened since my last post, I don't know where to begin. On top of everything else, I'm back to work and playing catch up from being off since last Tuesday.

Let me see, I'll start by saying that I am now bridal party drama free! Haha. It feels good to have the negativity away from me. I'm not going to go in to detail but it was definitely for the best. When you realize people are not for you, they must be against you and I don't need that mess around me. Peace to the haters!

On another note, Mai ordered her dress! Can you believe it? Everything that girl has been through over the past 5 months and regardless to my protests, she still made it her business to order her dress and be a part of the wedding. I'm amazed, happy, ecstatic, all in one. She really wanted to be a part of our day, no matter what. I love her =) Awww, let me not get emotional here.

Next, I went shopping with Mike's niece and his nephew's girlfriend over the weekend. I was able to get their tank tops from Old Navy for $5 a piece! I plan to use the rhinestone iron-ons to individualize each tank. For instance, his sister is married, so hers will say Mrs. XXX. His niece calls herself "Ms. Boss", so that's what her tank will say. I'm so excited! Hopefully, the rhinestones will come in soon so I can get started. I also purchased them the mini reed diffusers. They smell great; I'm just going to give them a goodie bag, basically with a bunch of stuff in it and then get them each something else. I don't know. I'll keep looking and see what I come up with.

I also received a coupon from eBay for 40% off on December 1 only. I used the coupon to get my garters. Total price wound up being $12! They are Philadelphia Eagles garters, one keepsake and one toss. Mike should really like them =0)

My invites came in, both sets! The VistaPrint invites as well as the 13 bottles that the lady replaced for me. They all made it in one piece, thank goodness! So this weekends' project is to put the boxes together, address and stamp them, and get them ready to be sent out on the 13th. Everything is right on schedule.

I designed my rehearsal dinner invites but I haven't ordered them yet. Well, actually not invites but menus. Next project is the brochures to go in the out of town boxes, which I'm purchasing from another knottie for an excellent price.

Whoo! That was a mouthful! I'm done for now and I'll return on Friday with pics of everything new. Goodnight. ^-^

Oh, I almost forgot, I received my My Publisher photobook. Love it! I used our engagement pictures and I got 2 for the price of 1! I'm thinking about gifting one to my parents. The quality is amazing and so many knotties recommend them. I see why. Definitely making a parent's wedding album with them. I'll post pics of it in the near future. Goodnight, seriously this time.

Saturday, November 22, 2008

Invites....part 2

I spoke to the woman who made the invites and even sent her pics of the damage. She kept apologizing and asked me what I wanted to do, either get a refund or she could make more bottles. We decided that she is going to make and ship me more bottles as soon as possible. I let her know that I want to get them out early December and she said she can make it happen. So we'll see. I really do love how they turned out and hopefully the other 13 will make it to NJ in one piece.

I'm still short about 5 invites, since we added to the guest list, so I'm ordered another version from VistaPrint. I'll probably use these to send to my 89 year old grandmother, who will probably look at the bottle like WTH? and to people I'm sure won't make it, or appreciate the bottle invite, mostly the older guests and those who probably aren't going to make it.

After Mike gives me the green light on the design he likes best (I made 4 different invites, similar styles) I'll place the order and be done with it. I'll post pics of the one we choose later.

Thursday, November 6, 2008

Cocktail menus mock-up

Here's the updated list:
  • Guest book sign

  • Brochures for OOT (out of town) bags

  • Rehearsal dinner menus

  • Memorial table sign (maybe)

  • fan programs

  • sand ceremony frame trial

  • photo sharing cards

  • menu cards

  • table numbers

  • cocktail menu (signature drinks and spirits)

  • RSVP cards

  • map and directions cards

  • fish net for card box


I played around with Microsoft Publisher and came up with the design for the cocktail menu. It's not complete, for one, I'm not sure of the actual types of alcohol we are providing, but the list is pretty close. Mike has to come up with a signature drink and I just want something pink. I will print this as a picture and display it on an easel at the bar, depending on how many I use for the tables.


Monday, November 3, 2008

New Projects

I looked at my list and right now, I can think of a few additional things I need to do:


  • Guest book sign
  • Brochures for OOT (out of town) bags
  • Rehearsal dinner menus
  • Memorial table sign (maybe)

The Memorial table is up in the air right now. Mike wants to honor his Mom in some way at the wedding but he hasn't quite figured out what he wants to do yet. If it includes a memorial table, I can hook it up.

This is the old list and what I have completed to date:

  • fan programs
  • sand ceremony frame trial
  • photo sharing cards
  • menu cards
  • table numbers
  • cocktail menu (signature drinks and spirits)
  • RSVP cards
  • map and directions cards
  • fish net for card box

Not too bad. I went to AC Moore on Saturday and bought another bottle for the officiant to use for the sand ceremony and I bought a little hermit crab to go in the treasure chest. I also have my cocktail menu designed, a rough draft basically. I'll post pics tomorrow. And our rings arrived; I didnt' have time to add it today, so I'll post pics tomorrow also.

Tuesday, October 28, 2008

Photo sharing cards done!

Another check off the list: photo sharing cards. I got some feedback from the knotties on which sites were best to use for guests to upload their photos. After checking out a few, the best one, overall, is Photobucket. So I created a card that I'm going to print on VistaPrint postcards or business cards to hand out to the guests. Hopefully they put them to use!


  • fan programs

  • sand ceremony frame trial

  • photo sharing cards

  • menu cards

  • table numbers

  • cocktail menu (signature drinks and spirits)

  • RSVP cards

  • map and directions cards

  • fish net for card box

Three things left on this list. Yay! Unfortunately, I recalled some other things I need to add to the list but I'll add them later.

My knottie purchases have arrived!

Fast shipping! Highly recommend. Sounds like what you'd write on eBay feedback. If I could do the same for these products I would. Let's start with the shoes: gorgeous. Love them. Perfect for the wedding and they were even cheaper than what she quoted by a couple dollars.

A different knottie (names escape me now, they are both named in a previous post) sold me the wooden IKEA easels and kids' activity sheets. Paid $16 for everything with shipping. I plan to display my table number/menu cards on them like the 5 x 7 picture is shown below. I think it looks great; not too big but should be noticeable enough for guests to find their table. I'm not painting them either; they're fine just the way they are ;-]
Lastly, the kid activity sheets:

It's in a pack of 12, which should be enough. I hope there's not more than that many children there =)

Friday, October 24, 2008

Table number update...

See this is the problem when you have too much time on your hands. Why did I have to go and mess with these table numbers? Now I am confused. Here's the old one:


Now here's what I've been playing around with:

Using the engagement photos, I love them! I think I'm totally going to scrap the first one. Help! What do you think? I'll keep you updated with what I chose.

Menu cards and Table numbers

Another check! I decided to kill two birds with one stone and do table numbers and menus combined. One for each table and they will sit on the easels, that should arrive any day. Only a few to go and I'm done with this list. I think I can only do the photo sharing cards now because I don't know yet what will go in the programs and I don't know what alcohol we're serving yet. So, those will have to wait. Not bad, if I knock everything else out.
  • fan programs
  • sand ceremony frame trial
  • photo sharing cards
  • menu cards
  • table numbers
  • cocktail menu (signature drinks and spirits)
  • RSVP cards
  • map and directions cards
  • fish net for card box


So here's my table numbers/menus. What do you think?


I will probably print them on ivory colored cardstock and glue them brown cardstock or I might make them two layered, with pink and brown cardstock. I used the same fonts that are on all things paper: georgia, majestic, and passions conflict. I think they're simple enough; just our colors with no designs or motiffs. They are actually going to be 8 inches tall and 4 inches wide. It looks bigger here because I saved it in MyPublisher to get it to save in picture format.

Monday, October 20, 2008

I can mark off the RSVP cards, they are done! Three down, don't wanna count how many more to go. I think the RSVP cards are simple enough but they tie in to all other things paper that I've created and that the guests have seen.
  • fan programs

  • sand ceremony frame trial

  • photo sharing cards

  • menu cards

  • table numbers

  • cocktail menu (signature drinks and spirits)

  • RSVP cards

  • map and directions cards

  • fish net for card box

I know this list is going to grow because I haven't thought of everything yet; in the meantime, it still feels good to scratch some things off. Here's pics of the front and the back of the RSVP card. Again, I will make them using free Vistaprint postcards.


I think they're cute! I also added the line for shuttle transportation because I need to get a head count of who's going to need it so I'll know what type of transportation to get. We have a couple of options, some cheaper than others, so it really depends on how many people are going to use it. So, we'll see. On to the next project.

Saturday, October 18, 2008

Sand ceremony trial

We are doing the sand ceremony instead of the unity candle. I first found out about the sand ceremony on theknot, of course and found a slew of information here: http://community.theknot.com/cs/ks/user/page.aspx?username=sandceremonybio

The above link has an abundance of information regarding the wording for the ceremony as well as the different bottles and other containers you can use to hold the sand. If you google, sand ceremony, a ton of info will pop up also. The newest trend is the sand ceremony frame. The frame is a shadowbox umbra ether frame and it has 4 panes of glass. One of the panes can be removed to hold the sand while a picture is displayed in front like this:


Getting the frame is another task: the one pictured above is from http://www.sandframes.com/. They customize your frame; you choose the wood and the send everything you need for the ceremony. I didn't want to pay that much, so I found the umbra frame at Kohls, on sale nonetheless for $14.99, and followed these instructions http://share.shutterfly.com/share/received/welcome.sfly?fid=a88f97c87060743e&sid=0QctHDFm1bMXbg to seal the frame to keep the sand from falling out. You can also purchase the frame from Amazon for $20. Right now, Kohls is running a special online to buy one frame get one free for $15. Great deal if you know someone else who could use the frame too. By the time I purchased the Flora Bond from Michaels, my frame cost me under $20, versus the cost from sandframes.

I decided to do a trial run, so I would know how much sand I'm going to need and if the bottles I purchased are big enough. This is the frame after I used the Flora Bond and put the glass back in place. I let it sit upright for at least 24 hours to dry.

The 2nd pic is a close-up of the Flora Bond. I scraped off the excess glue once it dried so it wouldn't be so caked up in the corners like the above picture.

I purchased 2 cork stopper bottles from AC Moore for like $1.50 total and I bought a 2 lb bag of sand for the trial. The bottles aren't big enough to hold 1 lb of sand each but from the trial I see that 2 lbs of sand will fill it up to the top almost; I just refilled a bottle with the remainder of the sand and that did it.

After it was filled, there was maybe a 1/4 of an inch of space left, which I plan to fill with the Flora Bond after the ceremony so the sand won't leak out of the top space. If you don't want to do that, you can leave the frame in the upright position but just know the sand will leak out the top if it's turned horizontal.

So, the plan is to go back and get one more bottle which I will use for the Officiant to pour sand for the "foundation" and on top of ours, sealing the deal. That sand will come from Paradise Cove. I'm going to decorate the bottles minimally, just a pink bow ribbon on mine, which will have pink sand, and a brown ribbon on Mikes' to go with his brown sand. Or vice versa, who knows. =)

Oh, I don't want to forget this, I was confused about adding the picture. What happens is you slide the first piece of glass up and tape the picture to the 2nd piece of glass. If you want to change pictures in the future, like we will, just remove the 1st piece of glass. No problem.

As far as sand, I'm going to purchase 1 lb each of the Azalea and Chocolate from http://www.moonglowcandles.com/wedding_sand.htm They have the most amazing colors and they match the colors in the David's Bridal and Alfred Angelo lines. How cool is that!

If it's not that serious with you, as far as the colors, the craft stores sell them too. Like I said, I bought the natural color in the photo above from AC Moore for $2.

Hope this helped someone and have fun!

Monday, October 13, 2008

Map and Directions card completed!

So, this is the list of what I have to do left:
  • fan programs
  • sand ceremony frame trial
  • photo sharing cards
  • menu cards
  • table numbers
  • cocktail menu (signature drinks and spirits)
  • RSVP cards
  • map and directions cards
  • fish net for card box


I'm quite sure there's more; I'll just add it as a I remember it. For now I can scratch off the Map and Directions cards. I haven't ordered them yet because I will probably wait until I complete the RSVP cards since they will both be mailed with the invitations. Hopefully, I'll get the invites soon. That's a story for another day. So here's the DIY map and directions cards (1st draft):


This is the front:


This is the back:


I'm going to use free postcards from VistaPrint to make them. I like how they turned out but I wonder if the palm tree is too much. I'll get some opinions and go from there. Simple but fun and they tie in with my save the dates and the overall beach theme of the wedding.

This was fairly easy to do following the instructions that is. There are several resources that can help you too. On TheKnot, you can use the Map Bio. You can also use Wedding Mapper. After you customize your map on wedding mapper, they can show you how to create one for your guests. I actually used the directions from knottie themarshmalo. She created a blog entitled "The super fabulous guide to creating super fabulous pocketfolds". Not only did I use her blog for my STD pocketfolds, but I learned how to create my map here also.


*****************UPDATE*******************


After having the knotties review my work, there were a few things pointed out that I updated on the final map and direction cards. Here's the new version:


I lightened up the lake, took out a "Lake Bryan" and took the US off after the Orlando zip code. I also made the street names all the same size and closer to the streets. I also realized that the font was Arial, which hasn't been used in any of my stationary thus far. So being anal as usual, I changed the fonts of the street names to Georgia to match everything else.

On the directions portion, I made sure Rd and other abbreviations ended with a period (.) I shortened one sentence under the Holiday Inn directions because Kim made a valid point; Vistaprint will cut off anything outside the dotted lines, which draw the line as to how far the printing will go. Another important point was brought up by another Paradise Cove bride about the directions I have listed from the North: you can't actually make a left turn onto Lake Bryan Dr. without making a U-turn. I don't know how I forgot that because coming from Kissimmee we had to do the same thing. So I added the U-turn info as well.

Now, I am happy with them. Oh, someone else mentioned not using the heart bullets; I thought about it, but I used them on my STDs so I might as well carry out the same design, to a certain extent. I don't want to use numbers or dots, so hearts it is!

Saturday, October 11, 2008

Upcoming projects

This is my first weekend off, yay! I still have so much to do wedding related as far as diy projects. I plan to tackle them one by one each weekend that I'm off. During the week the gym pretty much takes up my time. So far this is the list of upcoming projects that I can think of, or what's left to do:

fan programs
sand ceremony frame trial
photo sharing cards
menu cards
table numbers
cocktail menu (signature drinks and spirits)
RSVP cards
map and directions cards
fish net for card box

I think that's it for now, and that's plenty! I really need to get started. Whew, a lot of work ahead of me.

Monday, October 6, 2008

Finished aisle runner!

Whew! My aisle runner is done and I am happy with the results. I got instructions from knottie heatherjk on her blog at http://roadtotheaisle.blogspot.com/2007/07/diy-aisle-runner.html
The only thing I did different, which was minor, was use a regular pencil instead of a mechanical pencil mentioned in the link above, thanks to knottie kim&josh. Here's my version of the diy aisle runner. I bought the paint and an assortment of brushes from Michaels, using coupons of course to save some cash. I purchased an ivory french lace aisle runner off eBay for $13.95. It is so beautiful I was tempted to leave it as is:


I took my monogram to Kinkos as a jpeg and had them blow it up to 36 x 36. I then traced the monogram on the aisle runner. First tape the blown up version down then the aisle runner on top of it like this:

I'm tracing away...Finally, it's ready to be painted. This is probably really light, so you can't see it traced on the aisle runner. You can see the blown up version off to the right of it. Pops took this photo for me. He's so helpful!


The next day, I started painting the trees first using the pink color. Make sure you tape wax paper down first, then tape the aisle runner over the wax paper, Mike made himself useful and took these pics for me:


I was rusty at first, but after awhile I got the hang of it. Here's one finished tree:


The trees were a PITA! I decided for the next one it was easier to trace the outline first and then paint it:


I did a total of two coats of acrylic paint on the trees. The finished trees:


Yesterday, I finished the aisle runner using the brown paint on our names and dates. The finished product:


I love how it turned out and it will be a beautiful decoration for the ceremony. I forgot to mention that Mike suggested the monogram be in the middle so I measured it out and put the monogram approximately between 23 and 27 feet. The aisle runner is 50 feet.