The first one here is for Tiffiny aka Ms. Boss. First you make the words in Word, Publisher, or whatever application you choose. For this one I chose Edwardian Script. You have to stretch the wording, actually it's called kerning, so you have enough space between the letters to place the rhinestones. You change the text in Publisher by right clicking on the word after it's highlighted, choose character spacing and the new box will pop up for you to change the spacing. Once that's done and you're satisfied with how it looks, go to your printer settings. This will vary for each individual as far as how you do this, but you have to print your wording in mirror text.
This is how it looks printed: 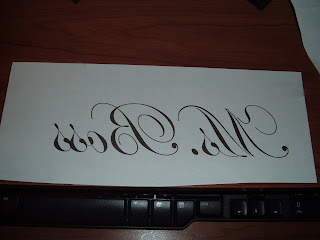
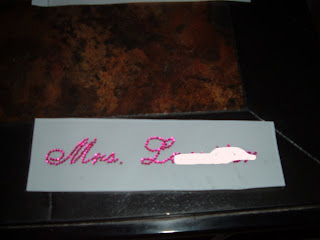
Once you have it printed, you take your mylar paper and place it over the wording sticky side up. Tape it down so the words don't move on you. Then, using tweezers place the rhinestones on the sticky paper stone side down, tracing the wording. This is mine completed with the stones:
Once you have it printed, you take your mylar paper and place it over the wording sticky side up. Tape it down so the words don't move on you. Then, using tweezers place the rhinestones on the sticky paper stone side down, tracing the wording. This is mine completed with the stones:
 Once you have all the stones in place, place the backside of the mylar paper back over the sticky side and smooth it out. Voila! You are done. This is my finished iron on:
 I made one for each girl and I plan to iron them onto tank tops I purchased from Old Navy. Each tank is a different color depending on their tastes. For example, my MOH Mai, loves purple, so she has a purple tank. I used different fonts with some of them, just playing around. In order, these are English 111 Vivace, Edwardian Script, and Passions Conflict.
Another one for my girl Wendy. She's a Diva, lol. The font is English 111 Vivace:
 The top one here is for MOH Mai. I've been calling her Motts since we were 7 years old! The 2nd one is my new last name with our wedding date. I'm putting that one on a light pink tank top to wear on our honeymoon.
This one is for my boyshorts to wear the day of the wedding. The font is English 111 Vivace:
This is going on the back of my hoodie to wear the day of the wedding. The font is Edwardian Script: 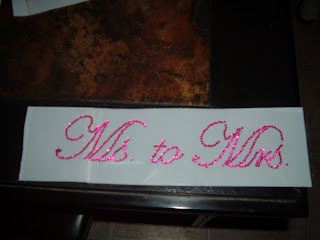
That's it. Hopefully this is helpful if you're thinking of doing it yourself. I bought the rhinestones from eBay for about $5, the mylar paper for $5 and each tank for $5. Very cheap DIY project and I think the girls will love them. I actually had so much fun making them, I'm thinking about hiring myself out to make them for others. We'll see.


No comments:
Post a Comment